Wednesday, March 30, 2011

Who's on Deck? or Rather, WHAT'S on Deck?

Happy SPRING!!!

Oh, I've been waiting to say that for, well, it seems like forever! I was so sick of the rain..and yes, I recognize that I didn't have it as bad as others did this winter, but I still think I have the right to bitch complain express my opinion...so anyway, I'm glad that it was over 70 degrees today and that I can sit here at 9pm with my bedroom window open...ahh, the lovely breeze...

Another thing I love about Spring is BASEBALL season..Woo Hoo!!  GO GIANTS!!

World Series Champion Giants!

Wooooo Hooo!! (Let me gloat, will ya...this is their first championship in San Francisco...and it might not happen again for a while I want to enjoy it)


I can't wait to head over to AT&T Park and cheer for my boys this season.


Nothing better than sitting in the stands eating a Giant Dog & sipping a beer lemonade...I'm not a beer drinker, but that's OK, I enjoy the game with or without a brew...

So anyway all this baseball talk got me thinking about my on deck circle. There are many projects on my roster and I hope to hit a home run with them all...I know there may be some strikes in there, but I hope to not strike out... are you sick of the baseball terms, yet? no? Yes? OK, enough, I'm done...I think

So with that said..here is my "to do" list in photos..PLEASE don't judge me...remember these are my BEFORE pictures... 

We'll start with an easy one..I need to spray paint this mail holder with the ever so wonderful Oil Rubbed Bronze by Rust-oleum


Next up are these cute little hooks I got from Michael's Craft Store. They were only a buck. I think they will be a cute addition to our closets. "B" on my side & "H" on the husband's...I'm going to paint them the same color as Grandma's dresser.


I think I should have taken the "B" out of the wrapper before taking this picture..oh, well!

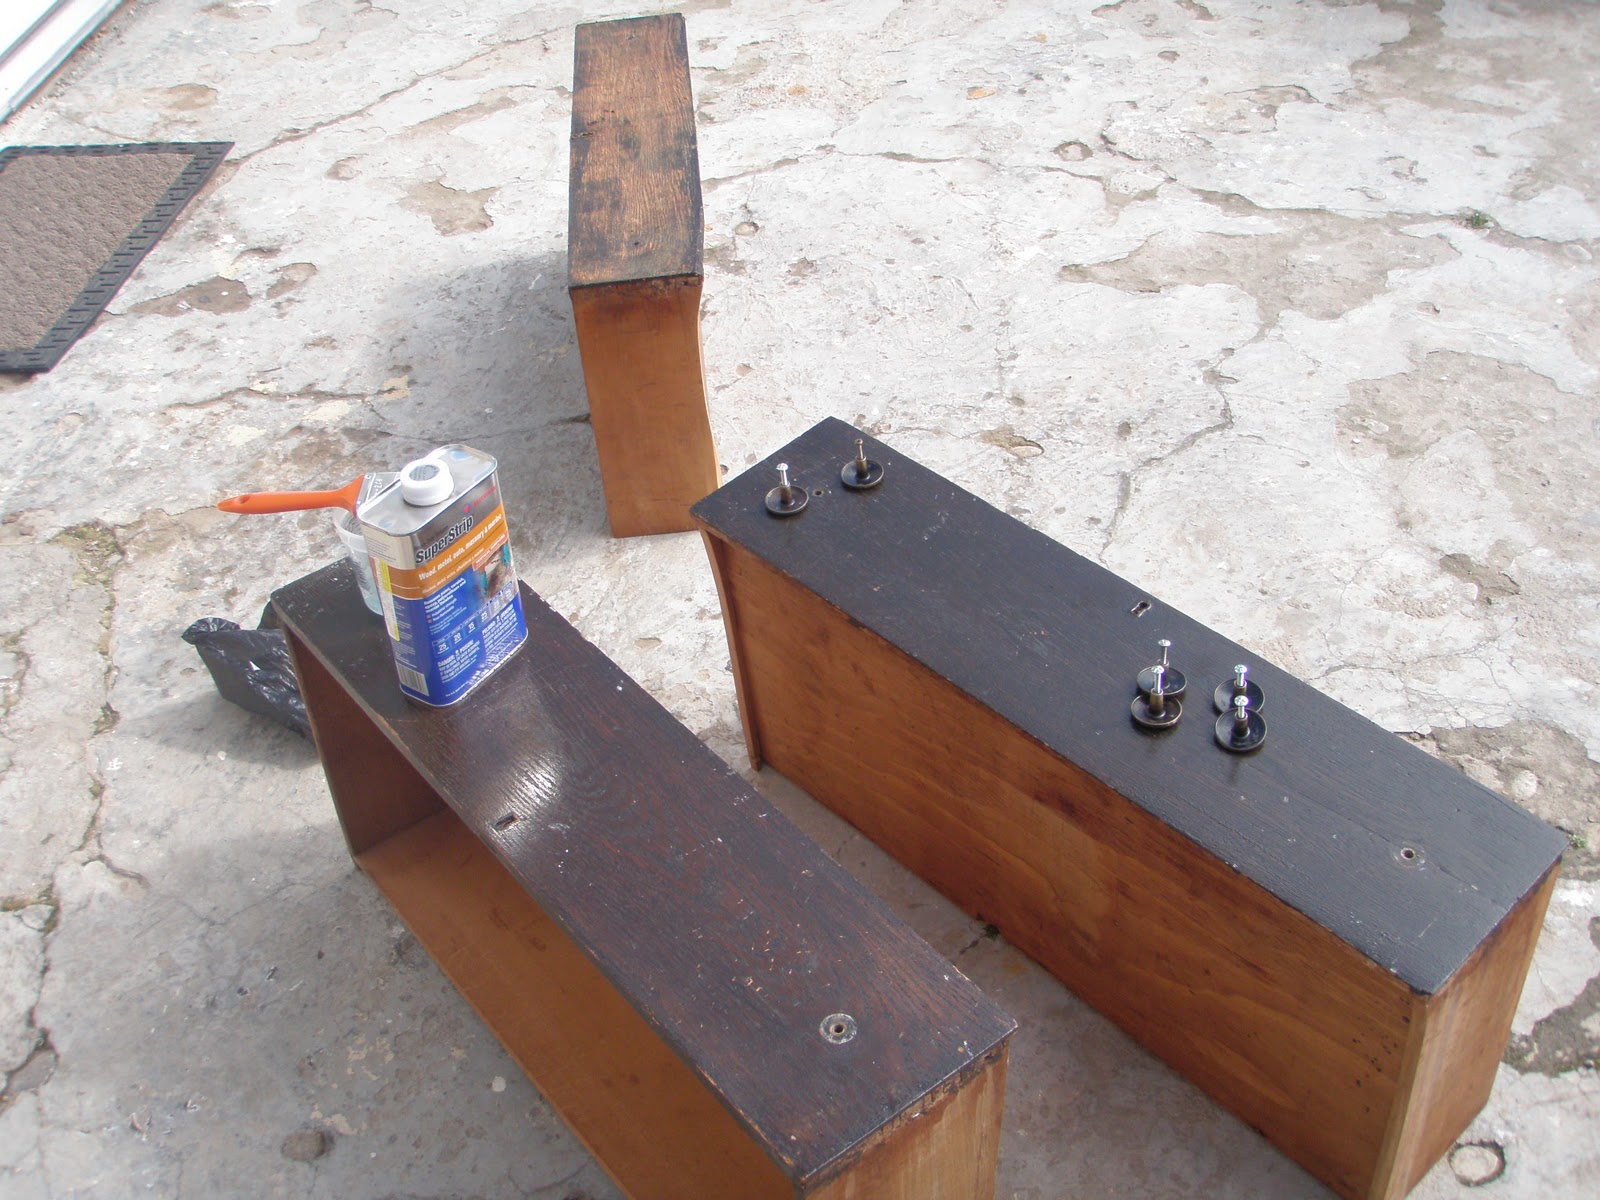
From here the projects get a teeny bit bigger. I really have to get to this spice cabinet. It's a mess...no lie

"If you don't use it, get rid of it"..this should be my mantra when I start this project

ugh, so gross...its OK, the first step is recognizing you have a problem, & trust me, I definitely recognize my problem...

Next up to bat...yeah, I didn't think I was really done..sorry...my mother-in-law had these chair cushions on the breakfast table in the kitchen. They are a bit old so my plan is to get rid of them give them a makeover...this should be interesting since some of you may recall from my "semi no-sew pillows" I don't sew..like, at all! Hmm. well I'll think of something...


Flowers? South Western? What is that pattern?

Now, are you ready for the monster project?

The project I've come so close to hiring out?

The project that stares at me with its ugly '70s stripes & says, "you can't do this" "you shouldn't even try"...

This nightmare of a chair needs some re-upholstering..badly...


So not '70s retro..more '70s yucko..
It looks innocent just sitting there doesn't it...

It taunts me...

IT. WILL. GO. DOWN!!

So tomorrow as the Giants take on their rivals...I will be taking on mine as well.

Stay tuned...I could...go.. all.. the..waaaay....(OK, definitely the last baseball reference)

Wish me luck!


Friday, March 25, 2011

No Turning Back

A few days ago I read a blog by Bev at flamingotoes . She had posted about a starburst mirror for her dining room. Well, we all know I love my sunburst mirror I made for my bedroom. Well when I saw Bev's, I had to have one...isn't it pretty?? Good job Bev!


Flamingo Toes
 Well, what this girl likes, this girl makes...so I went about gathering supplies...I thought this would be sooo easy...hit a few thrift stores, gather up a few spoons, knives, forks..what could be easier?? Well, let me tell you...I had a hell of a time trouble!

I hit my favorite junk store first (Class n' Trash on South Main St)...there I found a crap load lots of butter-knives. I had to spread them all out to find a few that matched


Luckily they know me there so it wasn't a big deal to take over the floor like that (thanks Diane & Mike). I ended up with these..pretty nice, huh?


The amazing thing (at least to me) was that their spoon & fork collection was nonexistent less than impressive. I think there were a few random forks (half of which were plastic) and maybe a random spoon..yes, that's spoon, as in singular! Aye, now what? Off to the Salvation Army...OMG! are you serious, all they had was ONE fork...yeah, ONE!! (Side note, I did find some clear contact paper for another project..YAY!) So anyway, what the heck is going on here?? So then I said Goodwill will solve my problem..nope! Savers..oh, no, not them either! I found a few forks at Yellow Brick Road in Carmel, but other than that...NOTHING! This was turning into a FAIL...In the end, Grandma saved me again. She let me pilfer her utensil supply..woo hoo, hooray, for grandmas!!

So now that I had all my utensils ready..I cut out my cardboard circles...I went the "el cheapo" route like Bev did..I figured, if it worked for her, it would work for me! Silly naive girl!


Bev & I both cut out two circles and hot glued them together. I also added masking tape around the edges, so that the edges would look cleaner.

Next I had to choose a layout for my utensils


I numbered them so that when I took them off, I'd know which order they went in..I'm a control freak smart like that. (but not smart enough to wash them before putting the tape on...yeah, tape comes off in water..duh!)

Anyway, once you figure out what pattern you like..start hot gluing them down...


and when you're done with that...add more glue..no, no...way more than that! We're talking MEGA glue!


Nice, huh? Yeah, I know..it looks yucky, but it won't for long....

Now, here's where I deviated from Bev's startburst design. Instead of putting a plate and mirror in the center, I wanted a monogram. After reading House of Hepworths 's blog and seeing all her wonderful "H" monograms, I realized that my new initial (the very wonderful Z) didn't get its fair share of the spotlight, so I wanted a white Z on a black background...

I printed out the Z I wanted from my computer and made a stencil


I printed it out on cardstock & taped the back of the paper with masking tape to make it a bit sturdier


All I had to do know was put the stencil over my painted wooden circle & paint over it with white paint


Now if you're impatient like me, the paint will smear when you lift off the stencil..I suggest you wait until the paint is dry. Learn from me people...

This is what it looked like when it finally dried


I sealed it with Mod Podge


Those lines dry clear, no worries.
 I placed my monogram on the utensils and got ready to glue it down. It should have looked like this


Did you notice I used the word should? Well, that's because it didn't work. The utensils had stayed glued at different heights so it was an uneven surface. After thinking on it a bit, I channeled MacGyver and came up with the idea to cut out an inner circle to even things out.


I think Richard Dean Anderson would be proud! So I glued that down and added more glue for my monogram...

FAIL..epic FAIL!! Apparently the "wood" that the monogram circle was made of didn't get along well with hot glue..what?? I though hot glue was the sh*t best!

What to do now?? Well, no turning back...the next day I went back to Class n' Trash & picked out a plate


This one was made of metal. I taped off the rim because it had a nice silver edge & I didn't want to spray paint over it. Instead of black I chose Oil Rubbed Bronze by Rust-oleum


That little wire thing is the plate hanger that I also sprayed because I don't like that you can see them against the plate once they are hung.

After the drying time, I stenciled my Z again.


and again, I pulled the stencil off too early so it got a bit messed up smudged on the top curve. Darn my impatience!

And I will admit I glued the plate onto the base before it was dry. I had already smudged it so I figured oh well...After all the set backs, I wanted this sucker up on my wall already...

and here it is...


I think it looks better than the wooden one, no?

Have you ever had an "epic fail" turn into a "better than the original"??

Oh, and in case you're wondering...this whole project only set me back a few hours and some grey hair about $7, give or take a fork or two... so thanks Allison (House of Hepworth) & Bev (Flamingo Toes). I hope I did you proud. Thanks for the inspiration

~Bernadette


Linking To:

Monday, March 21, 2011

Semi No-Sew Pillows

I should start this post by saying..I DO NOT SEW...really, I don't..I am a bit ashamed of that fact and I wouldn't mind learning, I just haven't made any moves to actually learn. Pathetic, I know, but the fact is that I don't and it never really truly bothered me until...I needed pillows for the small couch in the bar room.

I did try to buy pre-made pillows. Lots of places have them..the thing is..they are pricey...and paying mega bucks for throw pillows just wasn't in my plans.

I realized I would have to make my own. I let myself ponder that thought for a while because as I said before, I do not sew. Then while watching one of the many DIY Network or HGTV shows (I can't remember which) I saw one of the designers make no-sew pillows out of cloth napkins..just what I needed..personally I think the DIY Gods were answering my pillow prayers.

I found these pillows at Target for $8.99 for a pack of two. Not bad...


I know I could have stopped there & had pillows that were "good enough"..I didn't want good enough..I wanted AWESOME! I knew I needed a cool funky printed napkin.

Everyone knows that when you want cool looking napkins, you go to World Market. I found napkins with a great red & brown print, but I didn't want the pillows to be too busy looking so I chose to have a solid brown side to go with the printed side. World Market didn't have what I wanted, but I found a great textured brown napkin at Target.


Love that print! Next, I hit Beverly's Fabric to get the "Steam-a-Seam" fusible tape. While at the store I looked all around for a zipper or buttons that I could use to close up the fourth side of the pillow. I wanted the pillow cases to be removable so that I could wash them. I just couldn't find something I was happy with & then I found VELCRO circles. DING! I love an easy fix! They had a sticky back so I knew that would work.


I took all my supplies home & got to work. First I "sewed" the seams with the fusible tape


Basically you cut a strip of tape the length of the side of the napkins. Put the tape between the napkins and iron the seams. Your iron should not be set to the highest setting and you should only leave the iron in one spot for no more than 3-5 seconds. (better yet, read the back of the box)

After the seams were put together on three sides of both pillow covers I put the Target pillows in the cases and closed the fourth side of the pillowcases with the Velcro circles.


I will admit that I thought..TA-DA!! DONE!! and they did stay that way for months a few days...

Then I noticed that the sticky Velcro back only lasts for so long...bummer!

So I was forced to pick up a needle & thread. I added a very small stitch on each circle..fuzzy side & poky side too (technical terms, I know). I closed them back up & success!

Now I could really say..DONE!!

Don't they look good??


Here's a close-up...


Yup, I sure do love that print...I love World Market (World Market has not paid me to say that)
(Dear World Market CEO, I'm willing to let you pay me to say that...FYI)

Here's another great World Market Cloth Napkin pillow..I love love love this print too!!


Have you made your own no-sew or semi no-sew pillows..I'd like to see them!


Linked To:

Friday, March 18, 2011

Because Grandma Gave It To Me, That's why!

Years ago my grandmother gave me a three drawer dresser because I happened to mention that I thought it was cute...

Right away she said, "You like it? Take it." She says that all the time, so you have to be careful about what you complement her on. If you tell her you like her blouse or earrings, same thing. "You like it? Take it" Suddenly she's insisting you pack a bag with all the things you said you liked. Aye, Grandma!

Anyway, she gave me this dresser and for years it served as my tv stand in my bedroom. When I got married, it was one of the things I wanted to take with me, but I knew it needed a little bit of a makeover.

Here it is before: (I forgot to take a picture of it before taking the drawers out)


See? It has a cute shape, but the paint has got to go!! Pronto! Grandma says that a friend of hers painted it black for her. The paint looked like a dark chocolate color..somewhere between black & brown..closer to yuck, after all these years of tv holding... It looked so beat up & old that several people told me I should just junk it and buy a new one.

Of course I said, NO. As in no way Jose..uh-uh! Not gonna happen! Grandma had given me this dresser & I was going to make it beautiful...even if it killed me. In case you haven't realized yet, I don't like being told what to do or not to do for that matter...I have a bit of a problem with authority if you must know. lol..just kidding..I'm a total sweetheart...hmm..what to believe, right?

So if I was going to prove people wrong...it was time to get down to business.

I took the drawers out and stripped the paint off. My plan was to strip the whole dresser body & drawers so that I could stain it to match our other pieces of furniture in our bedroom. Our other stuff is a deep red mohogany.


three drawers & ugly brown knobs


that bubbly stuff is the paint stripper going to work

So after many, many, many coats of stripper on the drawers, I realized that stripping the dresser body was going to take waaaay too long..

So PLAN B was born...I decided painting the dresser body & drawers was the way to go. When DIYing, you have to have a plan B because plan A doesn't always work. In fact, I find that it hardly ever does, but that's ok.

I decided to paint the body the same color of the accent wall in our bedroom, Valspar's Flint (a deep grey,) partly because it would stand out against the lighter wall color & mostly because that happened to be the paint I had handy. Now I mentioned that this is an old dresser, right?  So the drawers were a bit...umm..we'll say..falling apart, crumbling in my hands...loose?...Nothing this DIYer can't fix & definitely nothing I'll admit to the "non-believers!" Those people that said it couldn't be done; that is wasn't worth the effort..ppfuh! What do they know?? Nothing, I tell ya!

So I glued all the seams so that they would be re-enforced and my undies wouldn't fall out the bottom..That would be bad! After the glue dried, I started painting the drawers first since they were already stripped & sanded. I had sanded out all the dings & scratches using a 220 grade sandpaper for my Black & Decker Mouse sander...I love that thing. Its the only kind of mouse I don't mind having in my house. The others send me running!!
Here's what I used:


After setting the drawers aside to dry, I started in on the body of the dresser. I still wanted a bit of the red mohogany, so that this piece wouldn't completely clash with the other furniture in the room. I decided that no matter what the top of the dresser looked like, I was going to stain it. I stripped it, sanded it &...found a bunch of permanent stains. Grrr..I knew they were permanent because I tried, repeatedly, to sand them out...didn't happen. Oh well, I had already said I was going to stain it no matter what, so I wasn't going to move on to plan C. I was sticking to plan B & that was that!! After sanding the top,  I lightly sanded the body & then painted the body it's cool new "flint" color.

This is what the top looked like:


Can you see the stains??


Ahh..there they are! Still, they aren't that bad...really!

Especially when you compare them to this other beauty mark:


Maybe the new drawer pulls will distract the eye from the missing corner..you think??


See? What missing corner?? Barely even noticable!

I don't see it anyway..

This project took a bit of time since the rain and my CTEBVI conference got in the way, but I think it was so worth it. I love having something that belonged to my grandmother. I mean, I know its not from when she was a girl & it really has no sentimental value for her, but it does for me now..it was grandma's & now it's mine..someday it'll go to...I don't know..some possible child yet to be born, who knows?!

For the time being, it'll live here:


Lots better, right? I certainly think so..I bet Grandma will too...

Ahh...feels good to be finished..

Wonder what else I can re-finish...hmmm...

Linking To:

You can now follow me on Twitter

Monday, March 14, 2011

Not Your Momma's Chile Verde

Every now and then I like to experiment with new recipes...ok, maybe a little more often than "every now and then"...its more like all the time...

Today I was feeling like I needed something warm and hearty...after lots of Googling, I found a recipe for Beef & Bean Chile Verde...now usually Chile Verde to us, Mexicanas, means pork in a green tomatillo sauce...well, you won't find pork or tomatillos in this recipe...


The Final Product

The ingredients are as follows:

1 pound 93% fat-free ground beef (the percentage of fat is important because you will NOT be draining the beef)
1 large red bell pepper, chopped
1 large yellow onion, chopped
6 cloves garlic, chopped
1 tablespoon chili powder
2 teaspoons ground cumin
1/4 teaspoon cayenne pepper, to taste (I ended up using 1/2 tsp, but it could use more if you want it spicier)
1-16 can of green enchilada sauce or green salsa
1/4 cup water
1-15oz can of whole pinto beans, rinsed

Garnish:
Monterey Jack Cheese
Chopped Purple Onion

Optional:
Tortilla Chips instead of tortillas, yum!

Yes, I used canned beans..shhh,...don't tell my momma!

Cook beef, bell pepper, and yellow onion in a large saucepan over medium heat, crumbling the meat with a wooden spoon, cook until browned.


Browning beef...

Add garlic, chili powder, cumin, and cayenne. Cook for another minute.
Stir in green enchilada sauce/salsa and water. Bring to a simmer. Reduce heat to medium-low, and cover, stirring occasionally. Cook another 10-15 minutes. Add beans & cook through.

Adding the green enchilada sauce

That's it! So easy and so good!! So its not exactly the Chile Verde we're used to, it comes out a bit more like Chili, but it sure is delicious! Pure yumminess!!

Give it a try...Let me know if you like it...& if you have a recipe that you love..I'd be glad to try it out..just email it over!

Enjoy!!