I finished the sunburst mirror and all for under my $20 goal...
the mirror was $3
the BBQ skewers were $2.15
the metallic silver spray paint by Rust-oleum was $6.99
So grand total is...$12.14!!
Pretty good, right?? I'm smiling BIG, W-I-D-E, HUGE right now... the store bought one in that size would have cost around $140, yeah, I'm happy!
and...here it is....
TADA!!!
Do you like??
I LOOOOOOOOVE!!!!
All I have to do now is hang it up over our headboard...
Speaking of headboards... here's my DIY...
I know what you're thinking...UMM, hello??? That's a door!!
Well, it used to be a door...now its a HEADBOARD!!
Want to see how???
Here we go...
First: find an old door...if you're lucky like me, it happens like this:
you 1st decide to replace your bedroom door & then DING...idea!!!
Why buy plywood or whatever when you can recycle your old door...it was the perfect width for our future king size bed...we have a queen right now...anyway
Second: you go on a seemingly endless search for fabric...have I mentioned how expensive fabric can be?? well, it can, but again if you're lucky like me, you get sick one day & when you are at Target waiting for your prescription, you run across these in the clearance aisle:
95 inch drapes in the most beautiful & velvety silver stripe...that clearance tag says $23.98, but when I reached for another drape, I found one that said $16.98...Price reduction!! SCORE!!! I bought THREE!!! (I only used 1 for the headboard)
My old door measures 30x80 so this 54x95 drape is PERFECT!!
The next thing I needed was foam & batting for my upholstered filling...that was the shocker in this whole process...I went to Joann's Fabric's in Morgan Hill & I looked at the price...$29.99 a yard!! YIKES!!!! That would have come out to more than $60!! WOW!!...foam is E.X.P.E.N.S.I.V.E!! I quickly put it back & kept on thinkin'...it was just too much once you added in all the other things I would need...bummer, was I going to have to scrap my beautifully imagined upholstered headboard???
UGH!!!
To console myself I went to HomeGoods in Gilroy...there I found...
That's a twin sized 3 inch mattress pad. On clearance for $29!!
SCORE #2!!!!
However, I was stressed a bit because it wasn't quite long enough for my old door..the mattress pad measured 72 inches long...8 inches short! Luckily though it was 45 inches wide, so all I did was cut off some width and added it to my length...like this:
See that can of stuff in the first picture?? That's spray glue that I had from some long ago project..insert the word FREE for the price there! Always try to use what you have at home...it just makes sense..
So, looking pretty good so far, yeah??
OK, next I wrapped the foam covered door with batting..I bought one queen size quilt batting for $15.99..no clearance..darn it!
See the sneak peek of the striped drape??
I stapled the batting to the door using a staple gun borrowed from my momma. Also free (because she loves me).
Now its time to make it beautiful by wrapping it in the striped drape...I couldn't take pictures of that step because I needed both hands..in fact I needed four, so the husband had to help me with the stapling on that one...
So I ended up with...drumroll, please....
There it is...my new upholstered headboard...what do you think??
Like??
again, I have to say I LOOOOVE!!!
Now obviously, its leaning against the wall there...I needed a way to hang it...so off I went to Ace Hardware...
I bought Flush Mount Hangers for $2.97
So lets see..what did this DIY cost??
Old door: FREE
Mattress Pad: $29
Spray Glue: FREE
Batting: $15.99
Drape: $16.98
Staples: FREE
Hangers: $2.79
Grand Total: $64.76 (+tax of course)
There's that BIG, W-I-D-E, HUGE smile again!
I just painted our bedroom so I haven't hung the headboard yet...here it is wedged between the wall and the mattress
LOOOVE!!
You know, people laughed when I said I was making my own headboard...I heard a lot of REALLY?? and HOW??
Of course that only made me more determined...and I did it..I bet you could too...
~Bernadette
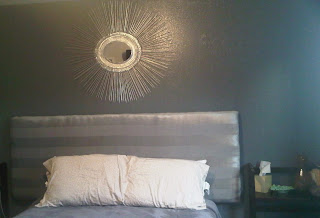
**UPDATE PICTURE**
Still not a great picture becasue I took it with my phone. Please ignore the messy pillows.


